Have you bought a used AirPods Pro but need help changing the gadget’s ownership? Although this might seem complicated, removing the AirPods’ previous owner is relatively straightforward.
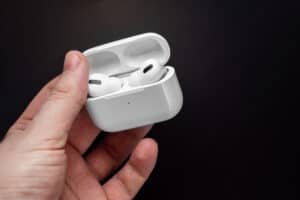
To remove the previous owner from AirPods Pro, you need to reset them. Put the AirPods pro in the case, close the lid, wait approximately 30 seconds, and open the cover. Press and hold the setup button located at the back for 15 seconds till the status light starts flashing amber and then turns to flash white.
To make things easier for you, we took the time to write a complete guide on removing the previous owner from AirPods Pro. We will also discuss setting up the new AirPods after resetting and eliminating the associated Apple ID.
Removing the Previous Owner From AirPods Pro
If you don’t know how to remove a previous owner from AirPods Pro, you need to reset them by following our step-by-step method.
- Put your AirPods Pro in the charging case and close its lid.
- Wait 30 seconds and open the AirPods Pro charging case lid afterward.
- Press and hold the “Setup” button at the back of the case for 15 seconds until the status light flashes amber and then turns to flash white.
- Your AirPods are now reset, and the previous owner has been removed successfully.
Setting Up the New AirPods
Now that you have successfully removed the previous owner of your AirPods Pro, it is time to set them up with your iOS device in the following way.
- Open Settings.
- Tap “Bluetooth”.
- Tap the toggle beside the Bluetooth option to the right to turn on the feature.

- Put the AirPods Pro in the charging case, open the lid, and place it closer to your iPhone or iPad.
- Your device will automatically detect the AirPods Pro and ask you to verify that they are yours.
- Tap “Connect” and press and hold the setup button at the back of the AirPods case for 5-10 seconds.
Next, verify that you see a “Connecting” message on your device, and when the connection is successful, you will see the battery percentages for your AirPods Pro and the charging case.
Renaming AirPods Pro and Removing Apple ID
If a family member in your household or a person in your office has bought your AirPods Pro and wants to use them with their iPhone, do these steps to remove the AirPods from your device.
Step #1: Renaming AirPods
In the first step, change the name of your AirPods, preferably to the name of the new owner. To do this, open Settings on your iOS device, tap “Bluetooth”, and tap the blue “i” icon next to your AirPods.
Now tap the forward pointing arrow next to the “Name” field indicating your AirPods name and change the name to the new owner.

Step #2: Removing Apple ID From Airpods
In the next step, you must remove your Apple ID associated with your AirPods Pro. To do this, head back to the “Bluetooth” menu, tap the blue “i” icon next to your AirPods, and tap “Forget this Device” on the new screen.

Finally, ask the other person to reset and set up the new AirPods on their iOS device using the methods mentioned above in this article.
Summary
In this short guide, we’ve discussed removing the previous owner from AirPods Pro by resetting them. We’ve also discussed setting up the newly reset AirPods with your device.
Moreover, we’ve explored a scenario where a person in your vicinity has bought the AirPods Pro and wants to use them on their device without being detected by yours.
Hopefully, your issue is resolved, and you can now use your AirPods with your Apple ID on your iPhone or iPad.
Frequently Asked Questions
AirPods Pro is a very small gadget, so it is very to lose them. However, Apple has made it easy for you to find the missing AirPods Pro using the “Find My iPhone” feature on the iPhone. Simply head to your device’s Settings menu, tap your name, and turn on “Find My iPhone”. Next, turn on “Find My Network” and enable the “Send Last Location” option.


