It’s no secret that having a fast and reliable network connection is vital for online activities such as gaming or streaming movies. But even the best hardware like Killer won’t do much good if you don’t have the correct network drivers. However, installing them can be daunting, especially if you’re unfamiliar with the process.
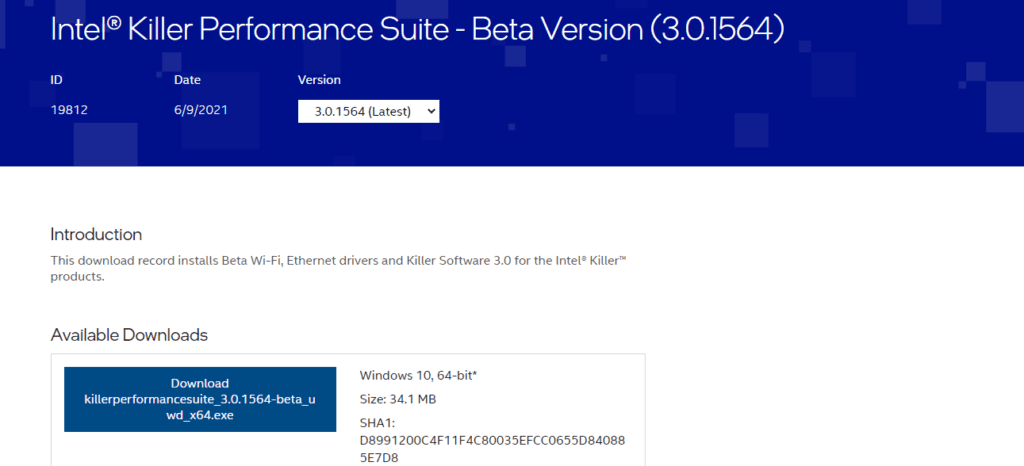
If you want to install Killer network drivers on your PC, go to the “Killer Network Manager Suite” download page, select “Intel® Killer™ Performance Suite”, click “View download options”, and download your desired version. Agree to the terms and conditions, install the driver, and restart your computer.
This article will show you how to install Killer network drivers with simple and easy-to-follow instructions.
Killer Network Drivers For Windows (32/64-bit)
Killer Wi-Fi Driver is a software developed by Killer Networking that helps improve the performance of your Wi-Fi speed and signal strength by optimizing the network bandwidth on your computer and communication with the router.
While Killer network drivers are not required for most users, it can be helpful if you are experiencing issues with prioritizing the network resource usage of applications.
Some of the Killer wireless network drivers for Windows (32/64 bit) are Killer (R) Wi-Fi 6 AX1650i 160MHz, Killer (R) Wireless-AX 1650s, Killer (R) Wireless-AC 1435-KIX, and Killer Wireless-N 1202.
Installing Killer Network Drivers
If you are wondering how to install the Killer network drivers on your Windows computer, our step-by-step method will help you go through this process without much effort.
Method #1: Installing From the Intel Website
Follow these steps to install the Killer network drivers from the Intel website.
Step #1: Visit the Official Website
In the first step, download the Killer software from the Intel website. If you want to download the whole suite, navigate to the Killer Control Center support page to get the 32-bit or 64-bit version.
If you want Killer Network Manager, head to the Killer Network Manager Suite download page, select the “Intel® Killer™ Performance Suite”, and click “View download options”.
Step #2: Download the Killer Performance Suite
To install the Killer Performance Suite, select the version from the drop-down menu under the “Version” option and click “Download”. Read the terms to the end and click “I accept the terms in the license agreement”.

Step #3: Install the Suite on Your PC
Once the Killer Performance Suite is downloaded, click it and follow the on-screen instructions to run the installation process. Restart your PC afterward to make the changes effective.
Method #2: Installing a Specific Killer Network Driver
If you want to install a particular missed Killer network driver, do the following quick steps.
- Go to the DriverHub website and click “Download DriveHub”.
- Click the downloaded file to run the installation process.
- Launch the software and click “Find Now” on the home screen.

- DriveHub will start scanning your PC for missing or outdated drivers.
- Select the Killer network driver from the list and click “Download” to install the driver.
How Do I Update Killer Network Drivers?
If you want to update a Killer Network Driver, follow the step-by-step instructions below.
- Download, install, and run the Bit Driver Updater software on your PC.
- Click the “Scan Drivers” option and let the software scan for corrupted or outdated drivers.

- Select “Update All” to update Killer network drivers and restart your system.
You can also use the DriverHub tool to update Killer network drivers.
Summary
In this article, we discussed how to install the Killer network driver to improve the connection speed on your system and avoid lag for different tasks. We’ve explained two step-by-step methods, one for installing the Killer Network Suite and the other for installing a particular Killer driver. We’ve also explained how to update the Killer network drivers.
Hopefully, your question has been answered, and now you can enjoy your online activities better.
Frequently Asked Questions
To uninstall the Killer network drivers, type “Apps & Features” in the Windows search and open it. Locate the Killer Performance Suite option from the list and click “Uninstall” to remove the drivers. Reboot your computer for the changes to take effect.
To disable the Killer Network Manager, launch the Killer Control Center. From the left-hand side of the screen, head to the “Settings” tab. Disable the “Killer Prioritization Engine” and right-click your Windows taskbar. Select “Task Manager” and click the “Startup” tab. Locate the “Killer Control Center”, right-click it, and disable the service to run at startup.
Yes, in some cases, the Killer network service is necessary. For instance, the service may be worth considering if you want to reduce lag during games or other processes and have a more stable connection.


