Short answer
Do it in this order: back up and check the backup opens, move your sign-in codes and chats, unpair your watch and earbuds, sign out of your accounts, take out the SIM, and only then erase it. Signing out first is what frees it for the next owner. Erase too early and you can lose what wasn’t backed up, or leave a lock that only you can remove.
- Back up, and open a few files from the backup.
- Move your sign-in codes and chats to the new phone, and unpair the watch and earbuds.
- Sign out of your accounts. This turns off the lock that ties the device to you.
- Take out the SIM card and the memory card.
- Erase it from its own settings.
- The new owner sets it up. It never asks for your account.
- Erase first and what wasn’t backed up is gone. Erased another way, such as from a recovery menu, it can still ask for your account at setup.
The right order, and the shortcut that goes wrong.
Just got a new one? Keep the old device as it is until the new one’s return window closes.
Your checklist
Pick the device and who it’s for. The steps for that device show in order, with a tick for each. Your ticks stay in this browser, so you can stop and come back. Best: open this page on another device, such as your new phone or a computer, because the erase deletes the list on the device you erase. The note at the end says what you did and how the buyer can test it. Every step is explained below the list.
0 of 20 done
Back up and test
Move what you sign in with
Unpair what goes with you
Sign out and turn off the locks
Cards, phone company and SIM
Erase it
Hand it over
A note for the new owner
It updates as you tick. Copy it into your listing or a message.
About this iPhone
When you set it up, it should not ask for my account or password. If it does, tell me before you pay.
Test it yourself on the iPhone in about 20 to 30 minutes, in its own browser: https://devicetests.com/used-phone-checklist
After setup, check that the IMEI in Settings matches the box.
Your ticks stay in this browser on this device, and erasing the device deletes them. Nothing is sent anywhere, and there’s no account.
1. Back up and check the backup opens
Erasing deletes everything on the device. A backup you never opened might be missing your photos, or be months old. So back up, then look at the date and open a few files on another device.
iPhone and iPad
- Open Settings your name iCloud iCloud Backup and tap Back Up Now. Stay on Wi-Fi until it ends.
- Under Back Up Now, check the date and time of the last backup. It should be today.
- Photos in iCloud Photos aren’t in that backup: they’re in iCloud already. Open icloud.com/photos on a computer and look at a few recent ones.
- Not enough iCloud space? Back up to your computer instead.
- Getting a new iPhone? Use Quick Start to move everything to it, and check your photos and messages arrived before you erase the old one.
Android
- Open Settings Google All services Backup and tap Back up now. Menu names differ a little between phones.
- Tap Backup details to see what was saved. Google says a backup can take up to 24 hours.
- Photos and videos are backed up by the Google Photos app. Tap your profile picture there: it should say Backup complete. Then open photos.google.com on a computer and look at a few recent ones.
- On a Samsung Galaxy, Smart Switch copies most of your data straight to a new Galaxy: open it on both phones, then Send from this phone on the old one. Check your chat apps separately (step 3).
Windows
- Type backup in the Start menu and open Windows Backup. It saves your Desktop, Documents, Pictures, Videos and Music folders, a list of your apps, and settings such as Wi-Fi passwords, to OneDrive. It needs a personal Microsoft account, and OneDrive is free up to 5 GB.
- Check what was saved in Settings Accounts Windows backup.
- Downloads isn’t in that list. Copy it, and anything saved elsewhere, to a USB drive. More than 5 GB, or no Microsoft account? Copy all your folders to the drive.
- Plug the drive into another computer and open a few files. Apps themselves aren’t backed up: you install them again on the new laptop.
Mac
- Plug in a drive and open System Settings General Time Machine. Choose Add Backup Disk, then let it finish.
- Open the Time Machine menu in the menu bar. The top line shows the date and time of the latest backup.
- Or copy your files to a drive, and open a few of them on another computer.
Chromebook
- Powerwash deletes everything saved on the Chromebook. Move what’s in the Downloads folder (in the Files app) to Google Drive or a USB drive.
- Open drive.google.com on another computer and check the files are there.
2. Test it and save the report
Before you erase it, let it prove itself. Our used phone and used laptop checklists test the screen, touch, buttons, speakers, microphone, cameras and more, one step at a time, on the device itself. The buyer can run the same check, so a report from you saves them time and gives them a reason to trust you.
Test it now
Used phone checklist
Run it on the phone or tablet you’re selling. The report shows what worked, what you skipped, and the battery health you read from Settings.
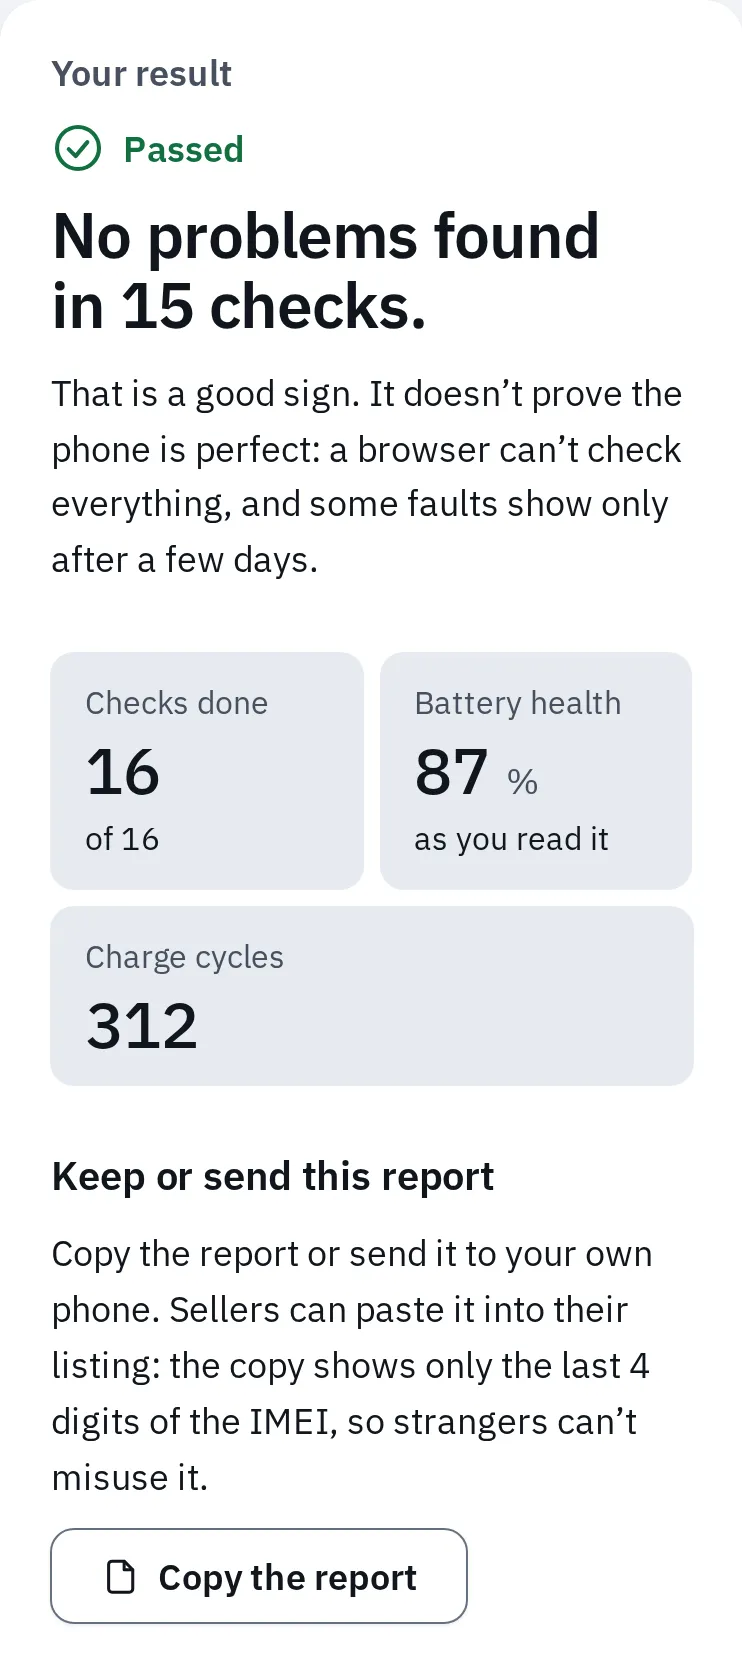
A whole check here, in Chrome with phone emulation. The copy shows only the last 4 digits of the IMEI, so you can paste it into a listing. Send it to your new phone before you erase: the erase deletes it.
Selling a laptop? Use the used laptop checklist the same way. Either report can be copied, shared or printed. Found a fault? Say so in your listing. A buyer who finds it later will want their money back.
3. Move sign-in codes and chats
Some things live only on the device. If you erase it first, they’re gone, and you can be locked out of your own accounts.
| What | Why it matters | What to do |
|---|---|---|
| Google Authenticator | The 6-digit codes for your email or bank may be only on this phone. | Sign in to your Google account in the app, and the codes sync. Or, on the old phone: Menu, Transfer codes, Export codes, and scan the QR code with Import codes on the new one. |
| Microsoft Authenticator | The same. Its backup only restores to the same kind of phone (iPhone to iPhone, Android to Android). | Turn on its backup (on Android, Cloud Backup in its settings; on iPhone, it uses iCloud), then restore on the new phone. Work or school accounts and a switch between iPhone and Android need signing in again on the new phone, before you erase the old one. |
| Text message codes | Codes sent by text go to your number, not the phone. | If your number changes, add the new one in each account’s security settings first. |
| Your chats are on the phone and in your chat backup. | Android to Android: Settings Chats Transfer chats. iPhone to iPhone: back up in Settings Chats Chat backup. Between iPhone and Android, follow WhatsApp’s own help for that move. WhatsApp says not to reset the old phone until the chats are on the new one. | |
| Signal | Your chats are only on the phone, unless you turned on Signal’s backups. | Use Signal’s transfer with both phones together. Android: Signal Settings Account Transfer account on the old phone. iPhone: start on the new one. Between iPhone and Android, check Signal’s help first. |
| Transit cards (Android) | A card with money on it can be on one phone only, and is lost if you erase it. | In Google Wallet, open the card, then the menu and Move card to another device. |
| Passwords and passkeys | Saved in a password app or in your account’s password manager. | Sign in to a few accounts on the new device before you erase the old one. |
| Moving from iPhone to Android | Texts from iPhones can keep going to iMessage on the old phone. | Turn off iMessage and FaceTime first (below). |
Moving from iPhone to Android
- Put the SIM in the iPhone, if you moved it already.
- Open Settings Apps Messages and turn off iMessage.
- Open Settings Apps FaceTime and turn off FaceTime.
- Already gave the iPhone away? Remove your number at selfsolve.apple.com/deregister-imessage. Apple says it can take a few hours.
4. Unpair the watch, earbuds and trackers
A watch, earbuds or tracker is tied to your account, not to the phone. Erasing the phone doesn’t free them.
- Apple Watch: on the iPhone, open the Watch app, then My Watch, All Watches, the info button next to the watch, and Unpair Apple Watch. Apple says unpairing resets the watch and removes its Activation Lock. Erasing it on the watch alone doesn’t. Selling the watch too? Choose to remove its cellular plan.
- AirPods, AirTag or Beats going with it: open the Find My app, choose the item, then Remove. Apple can’t remove this lock for you later.
- Pixel Watch going with it: in the Pixel Watch app, choose System, then Reset and unpair watch.
- Other watches and earbuds: unpair them in their app, or in Bluetooth settings (on Android, Forget; on a Galaxy, Unpair). If they go with the phone, reset them too, with the maker’s steps.
- Laptops: unpair your mouse, keyboard and headphones in Bluetooth settings, so they don’t try to connect to the old laptop.
5. Sign out and turn off the locks
Phones and Macs have a lock that ties them to your account. It’s there to stop thieves: after an erase, the device asks for the owner’s password. Signing out turns it off. If you don’t, the buyer can’t use it until you remove it. Signing out needs your account password, so check you know it first.
Activation Lock
iPhone, iPad, Mac
Turned on by Find My. Signing out of your Apple Account turns it off. Apple says erasing it with Erase All Content and Settings turns it off too.
Google and Samsung account locks
Android, Galaxy
Google calls it device protection. If your Google account is still on the phone, it can ask for it after a reset. On a Galaxy, it asks for the Samsung account too. Removing the accounts turns it off.
No lock to turn off
Windows, Chromebook
Microsoft’s steps for selling a PC have no lock to turn off: back up, reset, then remove it from your account. A Chromebook from work or school is the exception: it signs back in to them after a Powerwash.
iPhone and iPad
- Turn off Stolen Device Protection first: Settings Face ID and Passcode Stolen Device Protection (or Touch ID and Passcode). Apple says to do this before you sell or give away an iPhone. Away from home, it can make you wait an hour to sign out, so do it at home. If you set its delay to Always, the hour applies at home too.
- Open Settings your name and tap Sign Out at the bottom. Enter your Apple Account password.
- iOS 26 or later: choose Sign Out But Don’t Erase if you still need to do sections 6 and 7, or Erase this iPhone if you’re ready. iOS 18 or earlier: tap Turn Off to turn off Find My.
Android
- Open Settings Passwords and accounts. Google says some phones call it Users and accounts, Passwords, passkeys and accounts or Manage accounts.
- Tap your Google account, then Remove account, and Remove account again. Do this for every Google account on the phone.
- Remove other accounts too, such as your phone maker’s.
Android 15 or later with Identity Check on: away from places you trust, removing an account or resetting needs your fingerprint or face. Do it at home. Changed your Google password in the last day? Google says to wait 24 hours before a reset.
Samsung Galaxy
- Open Settings Accounts and backup Manage accounts.
- Tap your Google account, then Remove account, and Remove account again. Do this for every Google account.
- Tap your Samsung account, then Remove account and Sign out. Samsung says you need its password.
Samsung says to remove your Google account before you reset a phone you’ll give to someone. With Identity check on, turning off Find My Mobile away from your safe places takes an extra hour. Do it at home.
Windows
- Find your BitLocker recovery key. Many laptops encrypt the drive. The key is in your Microsoft account at aka.ms/myrecoverykey. Microsoft says to have it ready before a reset.
- Sign out of Office: at account.microsoft.com/services/office/install, find the laptop under Devices and choose Sign out of Office. Microsoft says the laptop can take up to 72 hours to notice.
- Apple Music or Apple TV app: click your name at the bottom of the sidebar, then Deauthorize Machine. Apple allows five computers.
- Remove a start-up (BIOS) password you set, in the laptop’s setup screen. Lenovo says it can’t remove a forgotten supervisor password: the main board has to be replaced. The reset below signs you out of Windows. You remove the PC from your Microsoft account after it (step 8).
Mac
- Mac with Apple silicon, or an Intel Mac with the T2 chip, on macOS Monterey or later: skip to section 7. Erase All Content and Settings signs you out of Apple services and turns off Find My and Activation Lock for you.
- Older Mac: open System Settings your name and click Sign Out. Using Apple Pay? Click Sign Out and Remove Cards. On macOS Monterey or earlier it’s in System Preferences Apple ID Overview.
- Open Messages, then Messages Settings iMessage and click Sign Out.
Chromebook
- The first Google account used on a Chromebook is its owner. A Powerwash removes every account, so there’s nothing to sign out of first.
- A work or school Chromebook can’t be reset by you, and signs back in to them after a reset. Only their IT team can release it.
6. Cards, phone company, SIM and eSIM
- Payment cards: on an iPhone, iPad or Mac, signing out or erasing removes your Apple Pay cards. On Android, erasing removes the cards from the phone (move transit cards first: step 3). Your bank can also remove a card from a phone you no longer have.
- Your phone company: move your number to your new phone, end any insurance on the old one, check it’s fully paid off, and ask for an unlock if it’s locked to their network. See how to check if an iPhone is unlocked.
- AppleCare: cancel it, or ask Apple to transfer it to the new owner.
- SIM and memory card: take them out. The SIM tool that came in the box goes with the phone.
- eSIM: delete it, but only once your number works on the new phone. If you erase it, your phone company has to set up the plan again. iPhone: choose to delete it when you erase (step 7). Pixel: Settings Network and internet SIMs (or Mobile network), the eSIM, then Erase eSIM. Galaxy: Settings Connections SIM card manager, the plan, then Remove.
7. Erase it
Erase it from its own settings, while it’s still signed in to nothing. Plug in the charger first: it can take a while. When it restarts, turn it off at the first setup screen. Let the new owner do the setup.
iPhone and iPad
- Open Settings General Transfer or Reset iPhone Erase All Content and Settings (on an iPad, Transfer or Reset iPad).
- Enter your passcode or Apple Account password if asked.
- Using an eSIM? Choose to delete the eSIM as well, if your number already works on the new phone.
- Tap Erase iPhone. Apple says erasing turns off Find My and Activation Lock, and removes your Apple Pay cards. Your iCloud content stays in iCloud.
Android
- Charge it to at least 70%. Google says a reset can take up to an hour.
- Open Settings System Reset options Erase all data (factory reset). Menu names differ between phones.
- Tap Erase all data, enter your PIN, and tap Erase all data again. For a trade-in, Google says to use this reset in Settings.
Samsung Galaxy
- Open Settings General management Reset Factory data reset.
- Tap Reset and follow the steps on the screen.
Windows
- Plug in the charger. Open Settings System Recovery and choose Reset PC.
- Choose Remove everything, then Cloud download or Local reinstall. Either one puts a fresh copy of Windows on it.
- In the settings for the reset, turn on Clean data. Microsoft says to use it if you sell, donate or recycle the PC. It takes longer, but makes your files harder to recover.
- Has the laptop more than one drive (a D: drive, say)? Choose to remove files from all drives too. Otherwise only the Windows drive is cleaned.
- The screen may stay black for up to 15 minutes. Don’t restart it: that can make the reset fail.
Microsoft says this isn’t a government-standard erase. Dell, HP and Lenovo have drive wipes in their start-up settings, but Dell says its wipe removes the operating system too. The buyer then gets a laptop without Windows.
Mac
- Apple silicon, or a T2 Intel Mac, with macOS Ventura or later: open System Settings General Transfer or Reset Erase All Content and Settings. On macOS Monterey: open System Preferences, then choose Erase All Content and Settings from the System Preferences menu in the menu bar.
- Enter your admin password, then follow Erase Assistant. It signs you out, turns off Find My and Activation Lock, and erases every user.
- When the setup screen appears, hold the power button until the Mac turns off, so the new owner does the setup.
- Older Macs: start in macOS Recovery, erase the drive with Disk Utility, then Reinstall macOS. When setup starts, press Command and Q to shut it down.
Chromebook
- Sign out of the Chromebook.
- Press and hold Ctrl + Alt + Shift + R, then choose Restart.
- Choose Powerwash, then Continue.
8. Hand it over
- Your SIM card: keep it, or give it back to your phone company.
- Your memory card. Your photos may be on it.
- Your own USB drives, and dongles for your mouse or keyboard.
- The charger and cable that came with it.
- The receipt or order email. It helps the buyer with the warranty. Cover your address and card number.
- Your test report, so the buyer sees what you checked.
- The original box, with the SIM tool if it has one.
What you keep, and what goes with it.
- Remove it from your account’s device list. Apple: Settings your name, tap the device, then Remove from Account (or at account.apple.com, Devices). Microsoft: at account.microsoft.com/devices, choose Show details, More actions and Remove. Google: at myaccount.google.com, open Security, then Manage all devices under Your devices, choose the old phone and Sign out.
- Meet somewhere safe for a sale, and get paid before it leaves your hands.
- Let the buyer turn it on and start setup. It must reach the screen for their own account without asking for yours. That shows them no lock is left. If it asks for yours, sign in and remove it there, or go back to step 5.
- Show your report, and let them run the used phone checklist or used laptop checklist if they like. On a laptop, they can do it after setup.
- Send the note you copied from the checklist before the erase, in your listing or a message.
Giving it to family or a friend
The steps are the same: sign out, erase, and let them set it up with their own account. If they use your Apple Account or Google account, your photos, messages and passwords end up on their device. Help with setup on the day, and add yourself to their emergency contacts or a family group if they want help later. Setting it up for a parent over the phone? See how to help your parents with tech by phone.
Already erased it, or handed it over?
iPhone, iPad or Mac
- Open icloud.com/find on a computer and choose the device.
- Not erased yet? Choose Erase This Device first, and wait until it’s done.
- Then choose Remove This Device. Apple says this removes it at once after an erase, or when the device is offline. If it says the device is online, don’t choose Continue: that marks it Ready for Repair or Trade In for 30 days and keeps Find My on. Ask the new owner to turn it off, then try again.
- Remove it from your device list at account.apple.com, and remove cards it had from Wallet on your new device or with your bank.
- Apple says to change your Apple Account password, so the new owner can’t reach your iCloud data.
Android
- Not erased yet? Open Find Hub on another device, choose the phone, then Factory reset. It will then ask for your Google account at setup, so step 3 follows.
- Open myaccount.google.com, then Security and Manage all devices. Choose the old phone and Sign out.
- If the phone asks for your Google account at setup, only you can get past it. Meet the new owner, sign in on it, remove your account in Settings, then reset it again from Settings.
- A Galaxy: also remove it in SmartThings Find: choose the phone, then the Find My Mobile link, the menu, and Remove.
Windows
- Open account.microsoft.com/devices, choose the PC, then Show details, More actions and Remove. Tick I’m ready to remove this device, then Remove.
- Not reset before it left? Ask the new owner to reset it (section 7), sign out of Office for it at account.microsoft.com/services/office/install, and change your Microsoft account password.
Questions people ask
Does a factory reset delete everything?
Yes, from the device’s own storage: apps, photos, messages and accounts. It doesn’t delete what’s in your iCloud, Google or OneDrive account, or what’s on a memory card. Take the card out. On a Windows laptop with a second drive, choose to remove files from all drives.
Do I need to remove my accounts if I reset it from Settings?
On Android, yes. Google says removing your Google account is what turns off its lock, and Samsung says to remove it before you reset a phone you give away. On an iPhone or Mac, Apple says Erase All Content and Settings turns off Find My and Activation Lock, but it lists signing out before erasing, and that gives you a last look at your backup.
Should I take the SIM out before I reset?
Take it out before you hand it over, before or after the reset. Delete an eSIM only once your number works on your new phone.
The buyer says it asks for my Apple Account. What do I do?
Remove it at icloud.com/find with Remove This Device, as in Already erased it, or handed it over?, then ask them to restart it. Or meet them, sign in, and erase it from Settings. Don’t give them your password.
Can I give my old iPhone to my child or parent and keep it on my account?
It’s better on their own Apple Account. Family Sharing lets you share iCloud+, Apple Music and other services without sharing an Apple Account. For a child, it also lets you manage their device with Screen Time and parental controls.
Will the laptop still have Windows after a reset?
Yes. Reset this PC puts a fresh copy of Windows on it. A maker’s drive wipe in the start-up settings, such as Dell Data Wipe, removes Windows too.